Alerts are a powerful communication tool that allow you to instantly notify your subscribers about important updates, trade signals, announcements, and time-sensitive information. With multiple delivery channels and scheduling options, you can ensure your message reaches the right audience at the right time.
Prerequisites
Before publishing alerts, ensure you have:
- An account with alert publishing permissions (typically admin or moderator roles)
- At least one subscription group configured in your system
- Delivery channels enabled in your system settings (Email, SMS, Push Notifications, or Webhooks)
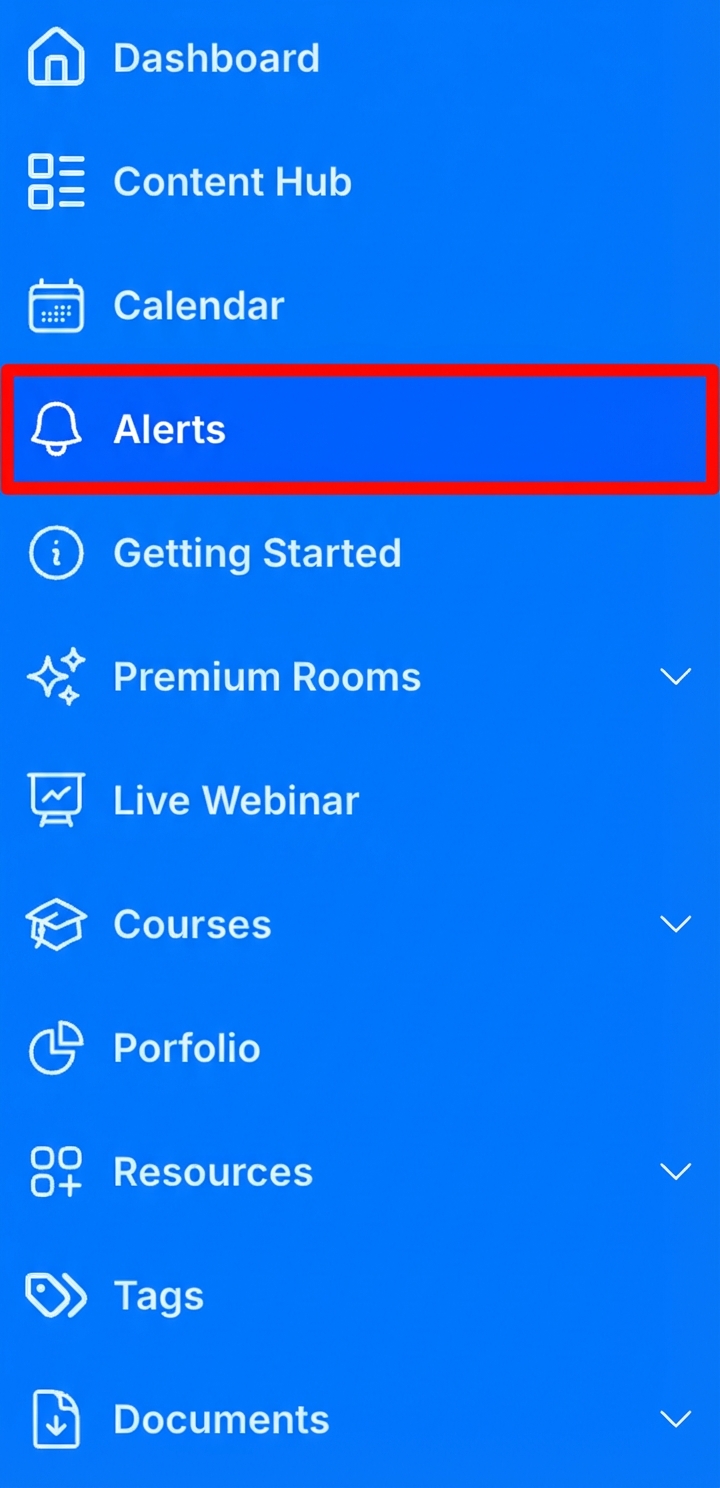
Accessing the Alerts Page
Objective: Navigate to the Alerts management page where you can create and view alerts.
- Log in to your WisePub account
- Click Alerts in the main navigation menu on the left sidebar
Expected Result: You’ll see the Alerts page with the alert creation form at the top and a list of published alerts below.
Understanding the Alerts Interface
The Alerts page is divided into several key areas:

Alert Creation Form
Located at the top of the page, this form contains all the options for composing and publishing your alert.
Live and Scheduled Tabs
Below the creation form, you’ll see two tabs:
- Live – Shows all published alerts in reverse chronological order
- Scheduled – Shows alerts that have been scheduled for future publication (visible only to admins)
Filter Panel
On the right side, you’ll find filtering options to search and filter through your alerts by date, subscription, and type.
Creating and Publishing an Alert
Step 1: Select Delivery Channels
Objective: Choose how your alert will be delivered to subscribers.
In the Channels section on the left side of the form, select one or more delivery methods:
- Push Notification – Sends a push notification to subscribers who have enabled push notifications on their devices
- Email – Sends an email to subscribers who have opted in to email alerts
- SMS – Sends a text message to subscribers who have provided their phone number and opted in to SMS alerts
- Webhook – Triggers a webhook to external services (useful for integrations with Discord, Slack, etc.)
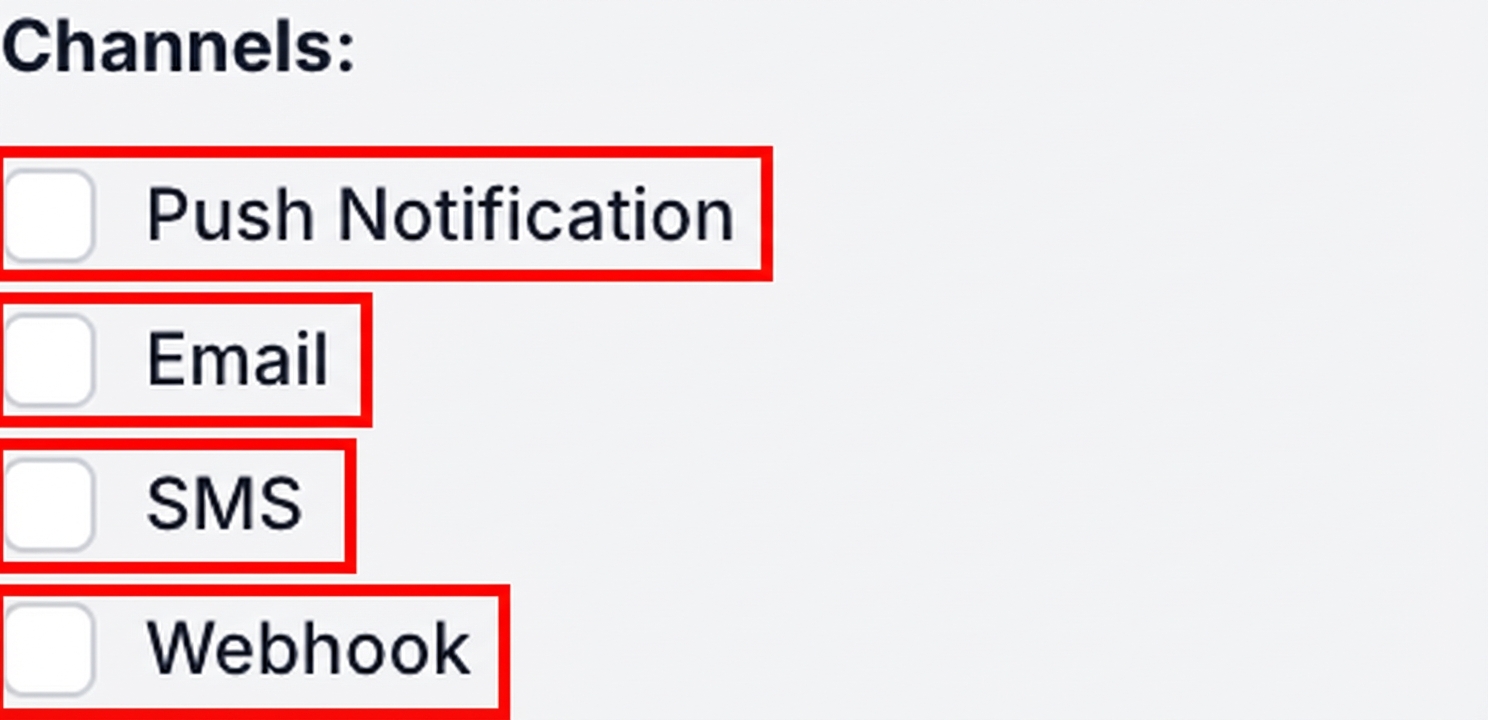
Pro Tip: You can select multiple channels simultaneously to maximize reach. The recipient count at the bottom of the form will show you how many users will receive the alert through each channel.
Step 2: Select an Alert Type (Optional)
Objective: Categorize your alert with a type label.
From the Type dropdown, these types are defined in the backend:
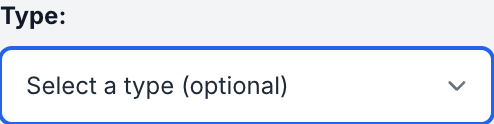
Expected Result: When you select a type, it will display as a colored badge on the published alert, helping subscribers quickly identify the nature of the message.
Step 3: Select Target Subscriptions
Objective: Choose which subscription groups will receive this alert.
- In the Subscriptions section, click on the subscription dropdown
- Select one or more subscription groups from the list
- Alternatively, click Select All to target all subscription groups
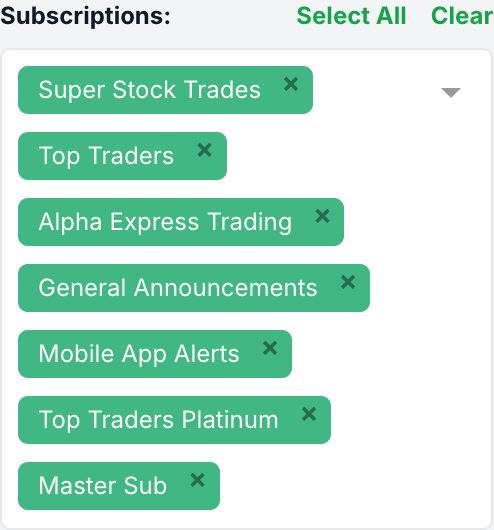
Expected Result: Selected subscriptions appear as tags in the field. Only members of these subscription groups will receive the alert.
Step 4: Configure Suppression (Optional)
Objective: Exclude specific subscription groups from receiving the alert.
The Suppression feature allows you to send an alert to multiple subscriptions while excluding certain groups. This is useful when you want to send a broad announcement but need to exclude a specific tier.
- After selecting your target subscriptions, the Suppression dropdown becomes available
- Select any subscriptions you want to exclude from receiving this alert
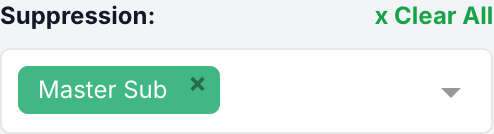
Expected Result: Members of suppressed subscriptions will not see this alert, even if they belong to one of the selected target subscriptions. An info message will appear confirming which subscriptions are suppressed.
Step 5: Enter the Alert Title
Objective: Add a subject line for your alert (required for email and push notifications).
- Click in the title input field at the top of the content area
- Type a clear, concise title that summarizes your alert
- Alternatively, click the sparkles icon on the left side of the input to auto-generate a title using AI (after you’ve written your content)
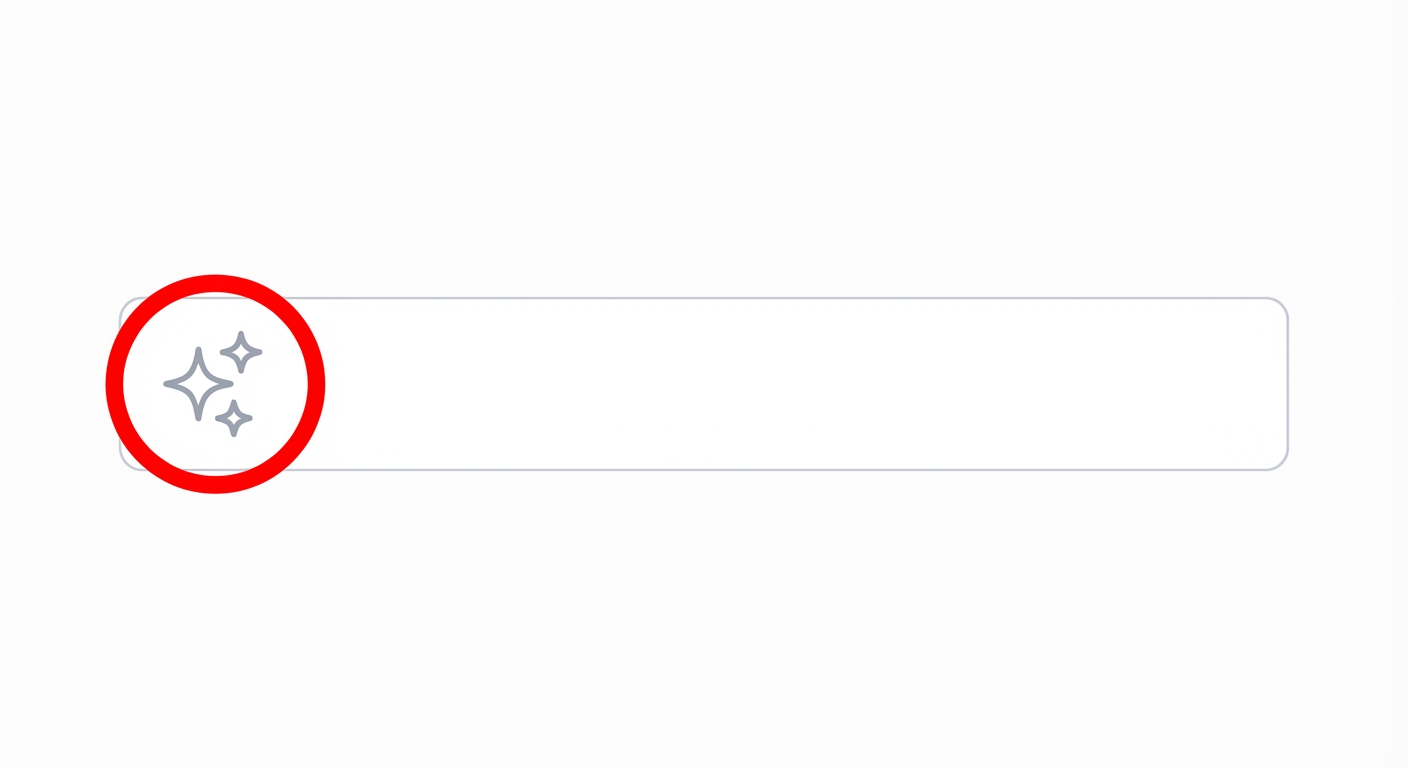
Pro Tip: The AI-generated title feature analyzes your alert content and creates a relevant subject line automatically. This is especially useful for lengthy alerts.
Step 6: Write Your Alert Content
Objective: Compose the main message of your alert.
- Click in the rich text editor below the title
- Type your message using the formatting toolbar:
- Bold, Italic, Underline,
Strikethrough - Links
- Ordered and bullet lists
- Images (you can copy and paste images in the editor)
- Clear formatting
- Bold, Italic, Underline,
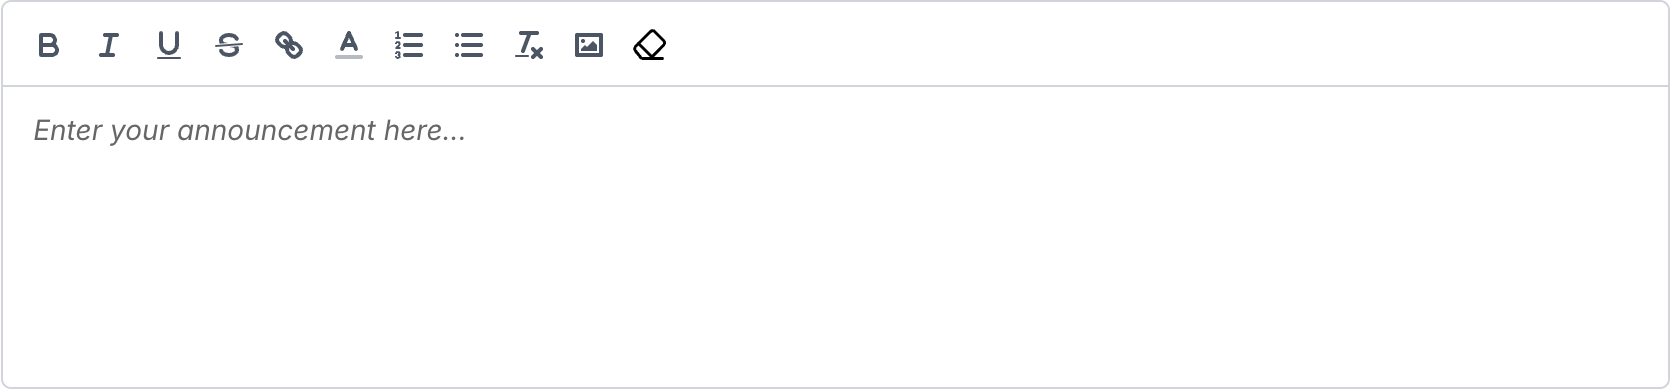
Expected Result: Your formatted content will appear exactly as written when subscribers view the alert.
Step 7: Use AI to Generate Alert Content (Optional)
Objective: Let AI help you write or format your alert content.
- Click the sparkles icon at the bottom right of the form (next to the Publish button)
- An AI input field will appear above the content editor
- Enter a prompt describing what you want (e.g., “BTO 1 AAPL Oct21 24 put for 2.50”)
- Click the sparkles icon in the AI input field to generate content
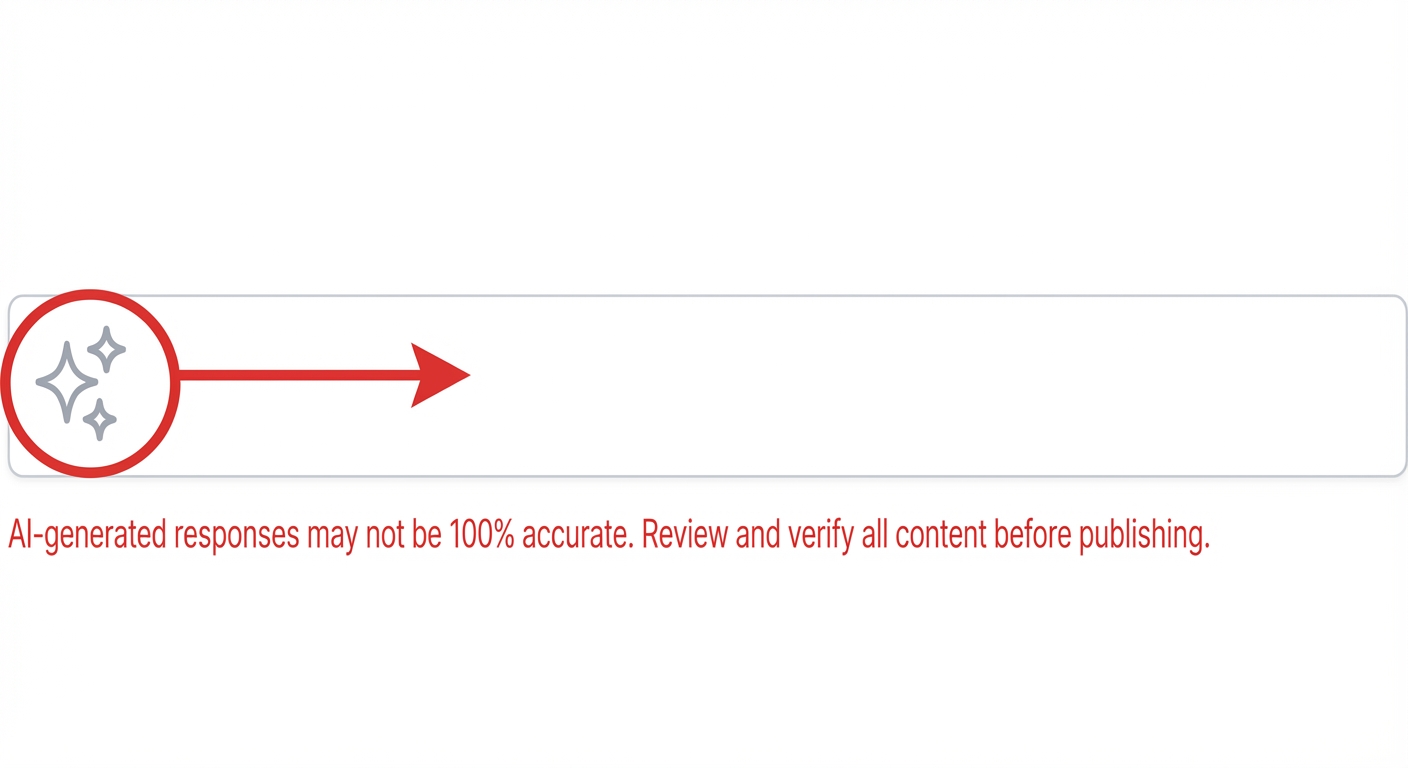
Expected Result: The AI will generate formatted alert content based on your prompt. Always review AI-generated content before publishing.
Important: AI-generated responses may not be 100% accurate. Review and verify all content before publishing.
Step 8: Configure SMS Custom Message (Optional)
Objective: Customize the SMS text if needed.
When SMS is selected as a delivery channel:
- By default, a standard SMS template is used (shown as “SMS text preview” below the editor)
- To use custom text, check the Custom Message checkbox next to SMS
- Your alert content will be used as the SMS message
![]()
Pro Tip: Keep SMS messages concise. Standard SMS templates typically include a link to view the full alert online.
Step 9: Review Recipient Counts
Objective: Verify how many subscribers will receive your alert.
Before publishing, review the recipient counts displayed at the bottom of the form:
- Total recipients (user icon) – Total unique users who will receive the alert
- Push (phone icon) – Users who will receive push notifications
- SMS (message icon) – Users who will receive SMS
- Email (envelope icon) – Users who will receive email
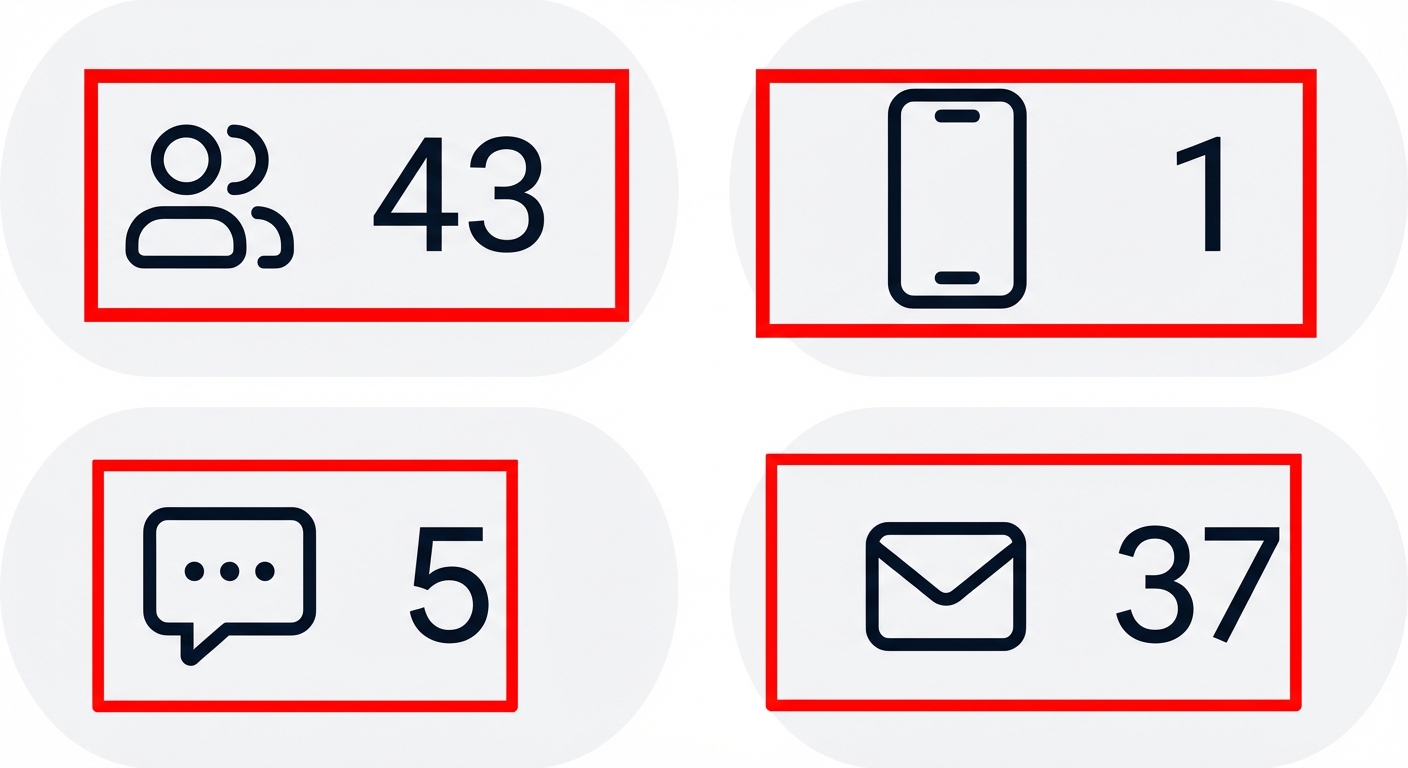
Expected Result: These numbers help you understand your alert’s reach before publishing. Counts update automatically when you change subscriptions or channels.
Step 10: Publish or Schedule the Alert
Objective: Send the alert immediately or schedule it for later.
To Publish Immediately:
- Ensure the Schedule checkbox is unchecked
- Click the Publish button
To Schedule for Later:
- Check the Schedule checkbox
- A date picker will appear – select your desired publish date and time
- Click the Schedule button (the Publish button changes to Schedule)
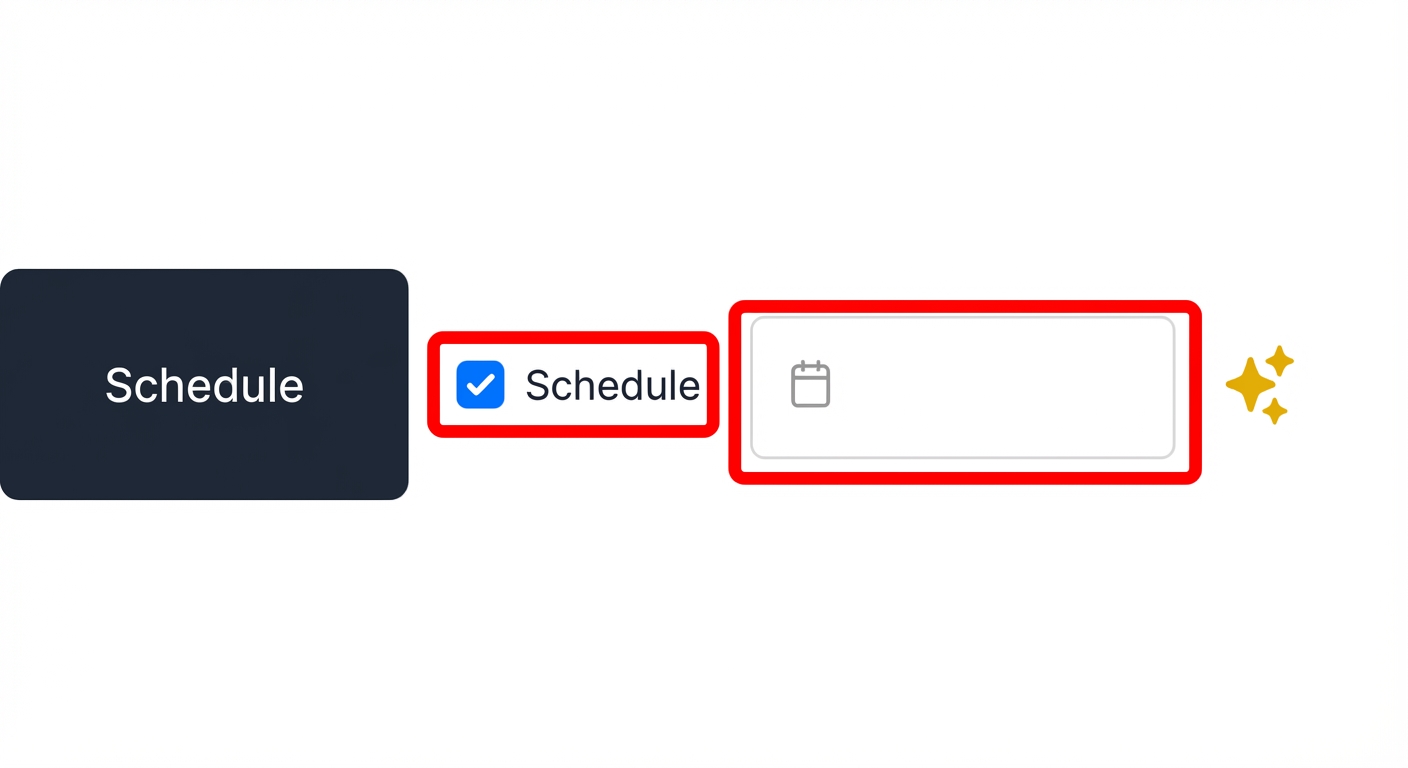
Expected Result: Scheduled alerts are saved and will automatically publish at the specified time.
Step 11: Mark Alert as Hidden (Optional)
Objective: Publish an alert that sends notifications but doesn’t appear in the public alert feed.
- Check the Hidden checkbox next to the Publish button
- Proceed with publishing or scheduling

Expected Result: Hidden alerts will be delivered through all selected channels but will not appear in the Alerts feed for regular users. Only administrators can see hidden alerts in the feed.
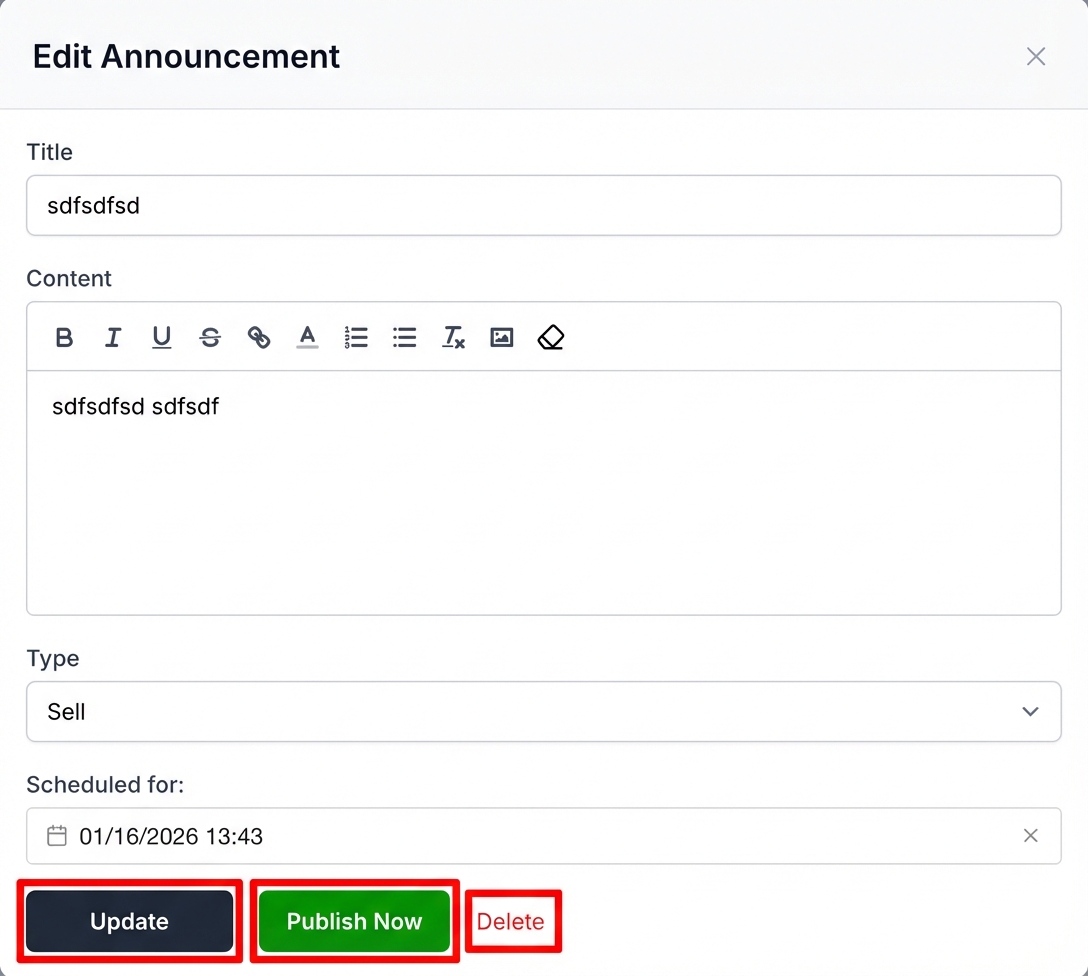
Managing Scheduled Alerts
Objective: View, edit, or publish scheduled alerts before their scheduled time.
- On the Alerts page, click the Scheduled tab
- View all pending scheduled alerts with their scheduled publish times
- Click Update (pencil icon) to edit a scheduled alert
- In the edit modal, you can:
- Modify the title, content, and type
- Change the scheduled date/time
- Click Publish Now to publish immediately instead of waiting
Expected Result: The scheduled alerts list shows all pending alerts with their scheduled times and management options.
Editing Published Alerts
Objective: Update an alert that has already been published.
- Find the alert in the Live tab
- Click the Update button (pencil icon) on the alert
- Modify the title, content, or type as needed
- Click Update to save changes
Pro Tip: Editing a published alert updates it immediately, but does not resend notifications to subscribers.
Deleting Alerts
Objective: Remove an alert from the system.
- Find the alert you want to delete
- Click the Delete button (trash icon)
- Confirm the deletion when prompted
Expected Result: The alert is permanently removed and will no longer be visible to subscribers.
Filtering and Searching Alerts
Objective: Find specific alerts using the filter panel.
Use the filter panel on the right side to narrow down displayed alerts:
Search by Keyword
Type in the search box to find alerts containing specific text.
Filter by Date
- Click the Start date picker to set a beginning date
- Click the End date picker to set an ending date
- Only alerts within this date range will be displayed
Filter by Subscription
Check one or more subscription boxes to show only alerts sent to those groups.
Filter by Type
Check one or more type boxes to show only alerts of specific types (Sell, Buy, Hold, etc.).
Clear Filters
Click Clear all to reset all filters and return to live mode.
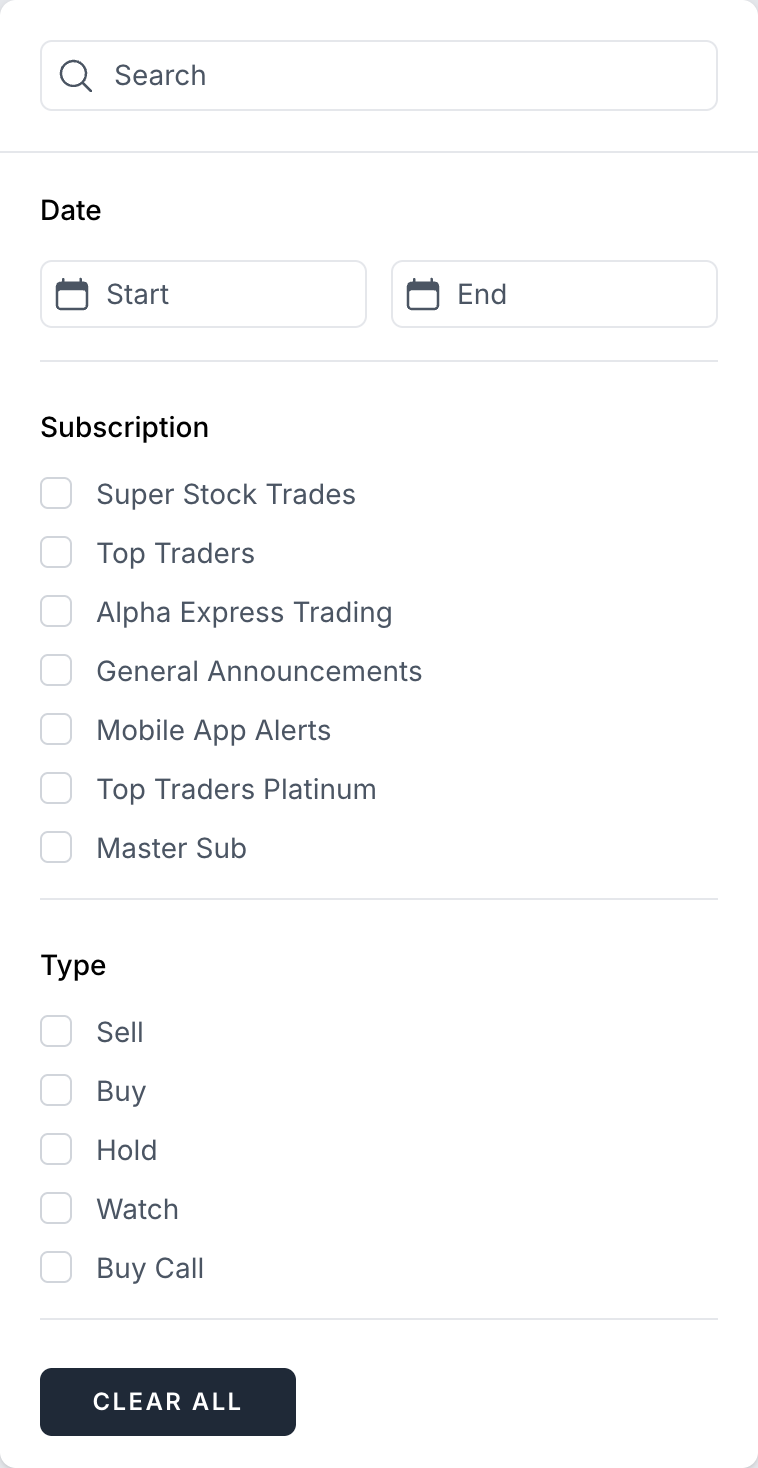
Expected Result: When filters are active, the “LIVE” indicator changes to show “Clear Filters To Go Live” – click this to quickly reset and return to real-time updates.
Tips & Best Practices
- Write Clear Titles – Make your alert titles descriptive and actionable, especially for email and push notifications where the title is the first thing subscribers see.
- Use Types Consistently – Establish a consistent meaning for each alert type so subscribers can quickly understand the nature of your message.
- Preview Recipient Counts – Always check the recipient counts before publishing to ensure you’re reaching the intended audience.
- Test Scheduling – For time-sensitive alerts, schedule them in advance rather than trying to publish exactly at market open or other critical moments.
- Leverage Suppression Wisely – Use suppression when sending tiered content to prevent lower-tier subscribers from receiving premium-only alerts while still reaching your broader audience.
- Keep SMS Concise – If using custom SMS messages, keep them brief and include a call-to-action to view the full alert online.
- Review AI Content – Always review and edit AI-generated content before publishing to ensure accuracy and your personal voice.
Summary
The Alerts system provides a comprehensive way to communicate with your subscribers across multiple channels. Key features include:
- Multi-channel delivery via Push, Email, SMS, and Webhooks
- Flexible targeting with subscription selection and suppression
- Scheduling for future publication
- Hidden alerts for notification-only messages
- AI assistance for content and title generation
- Real-time recipient counts to preview your reach
- Filtering and search to manage your alert history
By mastering these features, you can ensure your important messages reach the right subscribers through their preferred channels at exactly the right time.
Related Features
- How to create a subscription – Learn how to create and manage subscription groups for targeting alerts
- Using Default and Custom SMS Text for Alerts – Configure SMS templates for your alert notifications
- Webhooks Configuration – Set up webhooks to integrate alerts with external services like Discord or Slack
- SMS integration for alerts with Twilio – Configure Twilio for SMS alert delivery